Convenience Copier Printing: Install, Setup, Configure, and Print (B&W)
Setting up to Print to a Copier
1. Click the Download button next to "Print to B/W Copiers.zip".
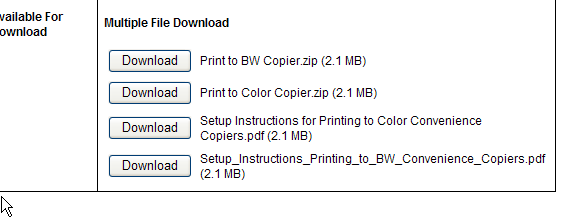
2. Click Open.
3. Save file to your Desktop by using the Drop-down Menu of the "Save In" field.
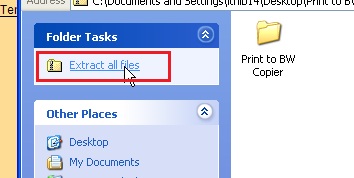
4. Click Extract All Files.
5. Click Next on the Extraction Wizard.
6. Browse to your Desktop, and click OK.
7. Click Next.
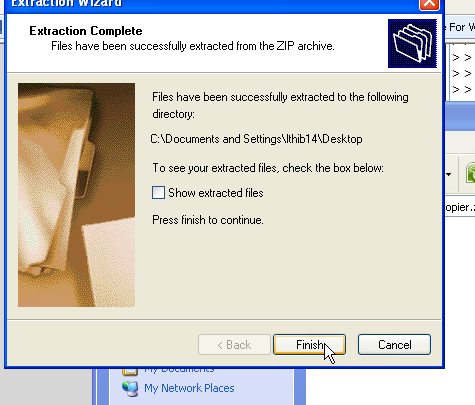
8. Deselect "Show Extracted Files" and click Finish.
9. Go to Start, Select Printers & Faxes, Click on Add Printer, and click Next.
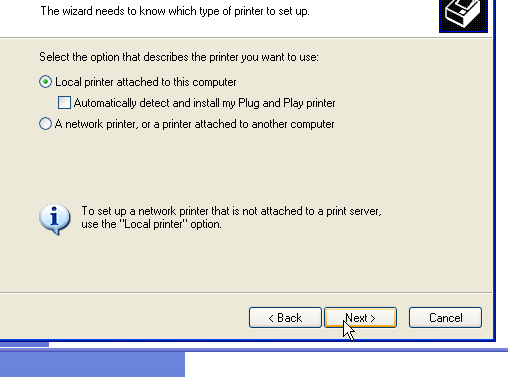
10. Select: Local Printer attached to this computer. (Do not select Auto detect and install....) and click Next.
11. Select Create a New Port, and from pull-down menu, Select: Standard TCP/IP Port.
12. Click Next.
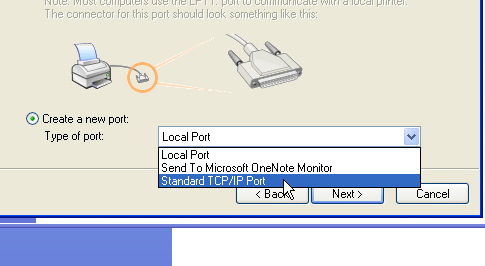
13. Click Next.
14. In Printer Name or IP Address Field... Type in the Copier Name.
Taylor
1. Taylor (CEBA) 2 B/W Copiers: copier-5501
LSU Library
2. LSU Library First Floor (Rm. 141) Color & B/W Copier: copier-
Choppin
6. Choppin Copier: copier-5515
Life Sciences
7. Life Science Copier: copier-5528
15. Click Next, then click Finish.
Installing the Driver
1. Click Have Disk.
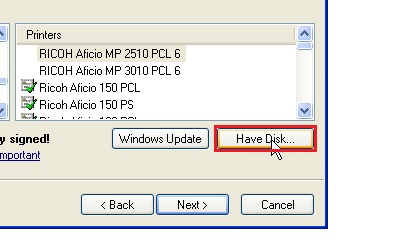
2. Click Browse, navigate to desktop, and find the Folder "Print to BW Copier" click Open.
3. Select file: "OEMSETUP.INF" and click Open.
4. Click OK.
5. Select: "Ricoh Aficio MP 2510 PCL6" and click Next.
6. Name the copier for easy identification for future use.
Example: Midd 1st BW, CEBA BW, Midd 4th BW
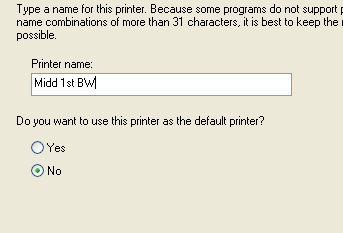
7. Check No under Do you want to use this printer as the default printer?
8. Select Do not share this printer and click Next.
9. Do not send test page, but click Next, then Finish.
Setting Up Accessories
1. Go to Start, select Printer & Faxes, and find the new icon for the printer you just created.
2. Right-click on the icon and select Properties.
3. Select Accessories.
4. Check Bypass Tray.
5. Check Duplex Unit.
6. Hard Disk will be checked. This is the default, do not remove check.
**Important Note: Do not adjust Total Memory.
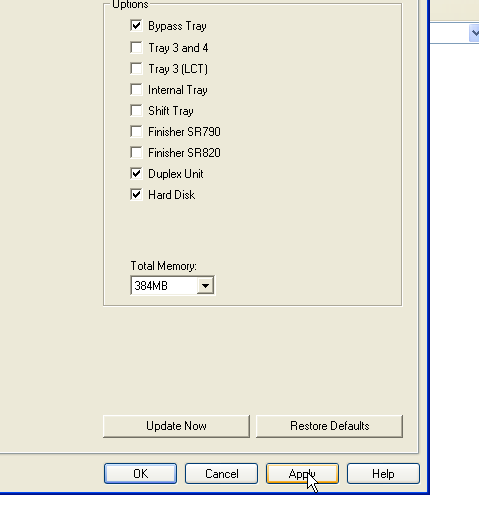
7. Click Apply and then click OK.
Sending your Document to the Copier for Printing
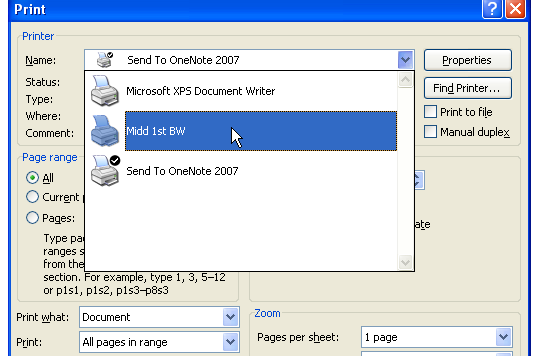
1. Open the Printer Window.
2. From the Printer Name pull-down menu select the copier that was previously installed.
3. The Locked Print Details window will Pop-Up.
4. Enter a User ID. This can be any name you choose.
5. Enter a Numeric Password, and click OK.
Important Note: You will use the User ID and Password to release the print jobs at the copier. If you are sending multiple documents save them under the same ID and Password so they will list together when you are releasing them for print at the copier.
Releasing your print job at the copier
1. Press the Printer button on the copier console, and the "Other Functions" screen will appear.
2. On the Touch Panel, select "Release Print Jobs".
3. Locate and select the User ID Name you created either under the "Local Jobs" Tab or the "Remote Jobs" Tab. User IDs will be listed alphabetically.
4. Enter the password you created, and when prompted, slide your Tiger Card into the Reader. (View the Tiger Card: LSU Overview.)
5. You should now see a list of all the print jobs you sent using the current User ID. Select the jobs you wish to print by pressing the touch screen. Those jobs with an X in the box will print.
6. Press the Print Button on the Touch Screen.
Important Note: Print jobs will remain in the queue for 24 hours and then will automatically delete.
[Return to Top]